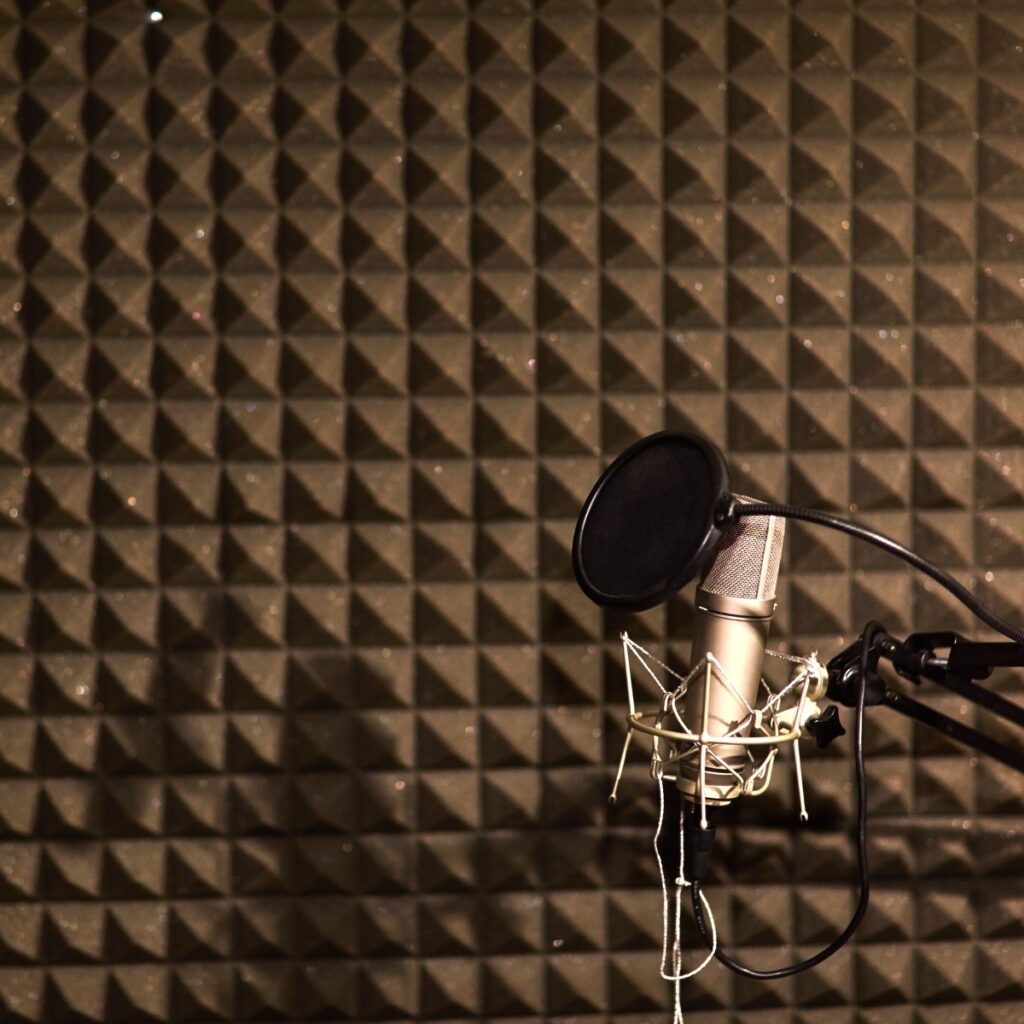
Soundproofing is a necessary evil if you want to record at home. Without it, you’ll be able to hear every footstep outside, every cough inside, and every burp and fart from the guy next door. Yuck!
Soundproofing is the process of ensuring no sound can get in or out of a room, usually used for practice rooms or recording studios. Soundproofing comes from using dense materials and providing air gaps between materials.
Soundproofing is a complex topic, but we’ll break it down for you. We’ll cover what it is and how to do it. Plus, I’ll share some useful tips and tricks along the way.

Making Sure Your Sound Stays Put
Floor
- If you’re looking to keep your sound from escaping, it’s time to tackle the floor. The key to soundproofing is mass and air gaps. Mass means that the denser the material, the less sound energy will be transferred through it. Air gaps, like building a wall with two layers of drywall separated by a small distance, are also important.
Walls
- Walls are the most important part of soundproofing. To really keep sound from getting out, you’ll need to add mass and create air gaps. You could add a layer of drywall, or even a layer of insulation. You could also add some acoustic foam to the walls to help absorb sound.
Ceiling
- The ceiling is the last line of defense when it comes to soundproofing. You’ll want to add mass to the ceiling by adding a layer of drywall or insulation. You could also add some acoustic foam to the ceiling to help absorb sound. And don’t forget about air gaps! Adding a layer of drywall with a small distance between it and the existing ceiling can help keep sound from escaping.
Soundproofing with a Floating Floor
What is a Floating Floor?
Floating floors are the way to go if you want to soundproof your home. It’s the perfect place to start before you tackle the walls and ceiling. Whether you’re in a basement on a concrete slab or on an upper floor of a house, the concept is the same – either “float” the existing floor materials (which is usually impossible or too expensive to do in an existing structure) or add a new layer of flooring that is decoupled from the existing floor.
How to Float an Existing Floor
If you want to float an existing floor, you’ll need to:
- Get down to the joists below the existing subflooring
- Install U-Boat floor floaters
- Replace the subflooring, underlayment, and flooring materials
- Use an underlayment material like Auralex SheetBlok to prevent sound transmission
- Frame a false floor (a wooden riser) and install it atop the existing flooring with isolators placed beneath it (only practical if you have high ceilings)
The Bottom Line
Floating floors are the way to go if you want to soundproof your home. It’s a great place to start before you tackle the walls and ceiling. You’ll need to get down to the joists below the existing subflooring, install U-Boat floor floaters, replace the subflooring, underlayment, and flooring materials, and use an underlayment material like Auralex SheetBlok to prevent sound transmission. If you have high ceilings, you can also frame a false floor and install it atop the existing flooring with isolators placed beneath it. So what are you waiting for? Get floatin’!
Walling Off the Noise
Auralex SheetBlok: The Superhero of Soundproofing
So you’ve decided to take the plunge and soundproof your space. The walls are the next step in your mission. If you’re dealing with typical drywall construction, you’ll want to get to know Auralex SheetBlok. It’s like a superhero of soundproofing, ’cause it’s 6dB more effective than solid lead at blocking sound. SheetBlok is designed so you can stick it right onto a sheet of drywall, and it’ll make a huge difference.
The Auralex RC8 Resilient Channel: Your Sidekick
The Auralex RC8 Resilient Channel is like your sidekick in this mission. It makes it easier to create a SheetBlok sandwich, and it can support up to two layers of 5/8″ drywall plus a layer of SheetBlok in between. Plus, it’ll help decouple the walls from the surrounding structure.
Building a Room Within a Room
If you’ve got a big enough room, you can add another layer of drywall and SheetBlok spaced away from the existing wall. This is like building a room within a room, and it’s a technique used by some of the best recording studios. Just remember: if you’re adding a lot of weight to a non-load-bearing structure, you’ll need to get the approval of an architect or qualified contractor.
Soundproofing Your Ceiling
The Theory
- The same rules apply for your ceiling as your walls and floors: sound isolation is achieved by adding mass and introducing air gaps.
- You can create a SheetBlok/drywall sandwich and hang that from your ceiling with the use of Auralex RC8 Resilient Channels.
- Refinishing the floor above your ceiling with a layer of SheetBlok and perhaps some cork underlayment could make a big difference too.
- Insulating the space between your ceiling and the floor above with glass-fiber insulation is worth considering.
The Struggle is Real
- Adding mass and introducing air gaps in your ceiling structure is a challenging task.
- Hanging drywall on walls is tough enough, and doing an entire ceiling is even more challenging.
- Auralex Mineral Fiber insulation is sound rated to reduce sound transmission through walls and ceilings, but that doesn’t make the task any easier.
- Soundproofing your ceiling is a laughable task, but it’ll go a long way toward creating a sonically isolated space.
Seal the Deal
Sealing Around Wall/Floor Intersections
If you want to keep sound from leaking out of your studio, you gotta seal the deal! Auralex StopGap is the perfect product for sealing up all those pesky air gaps around wall outlets, windows, and other small openings. It’s easy to use and will keep your sound from escaping like a thief in the night.
Sound-Rated Doors and Windows
If you’re looking to keep the sound in and the noise out, you’ll need to upgrade your doors and windows. Double-pane, laminated glass windows do a great job of reducing sound transmission, and sound-rated doors are also available. For extra soundproofing, hang two doors back-to-back on the same jamb, separated by a small air space. Solid-core doors are the way to go, but you may need to upgrade your hardware and doorframe to hold up the extra weight.
Quiet HVAC System
Don’t forget about your HVAC system! Even if you’ve decoupled your room from the rest of the building, you still need ventilation. And the sound of your HVAC system turning on can be enough to ruin your sense of sonic isolation. So make sure you get the quietest system available and leave the installation to the pros.
Soundproofing vs. Sound Treatment: What’s the Difference?
Soundproofing
Soundproofing is the process of blocking sound from entering or leaving a space. It involves using materials that absorb sound waves and prevent them from passing through walls, ceilings, and floors.
Sound Treatment
Sound treatment is the process of improving the acoustics of a room. It involves using materials that absorb, reflect, or diffuse sound waves, creating a more balanced sound in the room.
Why Both Are Important
Soundproofing and sound treatment are both important for creating a great recording space. Soundproofing helps to keep outside noise from entering the room and interfering with your recordings, while sound treatment helps to improve the sound of the recordings you make in the room.
How to Achieve Both on a Budget
You don’t have to break the bank to soundproof and treat your recording space. Here are some budget-friendly tips:
- Use acoustic foam panels to absorb sound waves and reduce echoes.
- Use acoustic blankets to block sound from entering or leaving the room.
- Use bass traps to absorb low frequencies and reduce bass buildup.
- Use diffusers to scatter sound waves and create a more balanced sound.
Soundproofing a Room: A Guide
Do’s
- Improve your room acoustics with a combination of sound absorption and diffusion techniques.
- Leave some spacing between fabric panels to avoid a “box of tissues” sound.
- Throw a blanket over your head and microphone to dampen any extra noise.
- Take into account the size of your room when soundproofing.
- Differentiate between room ambiance and noise floor.
Don’ts
- Don’t over-soundproof your space. Too much insulation or panels will take out all the high-end sound.
- Don’t forget to soundproof based on the size of your room.
- Don’t ignore the noise floor.
Soundproofing Your Space on a Budget
Egg Crate Mattress Covers
- Egg crate mattress covers are a great way to get soundproofing on the cheap! You can find them at most discount stores and thrift stores, and they’re easy to install by gluing or stapling them to your walls.
- Plus, they work similarly to acoustic foam, so you’re getting a two-for-one deal!
Carpeting
- Carpeting is a great way to soundproof your space, and the thicker the better!
- You can attach carpet to your walls or cut strips of carpeting and attach them to the seams around windows and doors to dampen the noise coming in from outside.
- If you want to save even more money, head to your local flooring company and ask about purchasing their miscuts.
Sound Baffles
- Sound baffles are barriers that stop reverberation in a room.
- Attach sheets or pieces of foam at various points across your ceiling to reduce airborne sound. They don’t need to touch the floor to make a big difference.
- And the best part? You probably already have these items lying around your home!
Differences
Soundproofing Vs Sound Deadening
Soundproofing and sound dampening are two different approaches to reducing noise. Soundproofing means making a room completely impervious to sound, while sound dampening reduces sound transmission by up to 80%. To soundproof a room, you need acoustic sound panels, noise and isolation foams, sound barrier materials, and noise absorbers. For sound dampening, you can use injection foam or open cell spray foam. So if you’re looking to keep the noise down, you’ll need to decide which approach is best for you.
Conclusion
Soundproofing is a great way to ensure your studio is truly isolated from outside noise. With the right materials and techniques, you can make your recordings pristine and COMPLETELY free from outside interference.
From professional setups to DIY solutions, there is something for every budget. So don’t be afraid to get creative and start soundproofing your studio today!
I'm Joost Nusselder, the founder of Neaera and a content marketer, dad, and love trying out new equipment with guitar at the heart of my passion, and together with my team, I've been creating in-depth blog articles since 2020 to help loyal readers with recording and guitar tips.

